
Portable Installation Suite
for producing Meteor M 2-3 and M2-4 GIS images
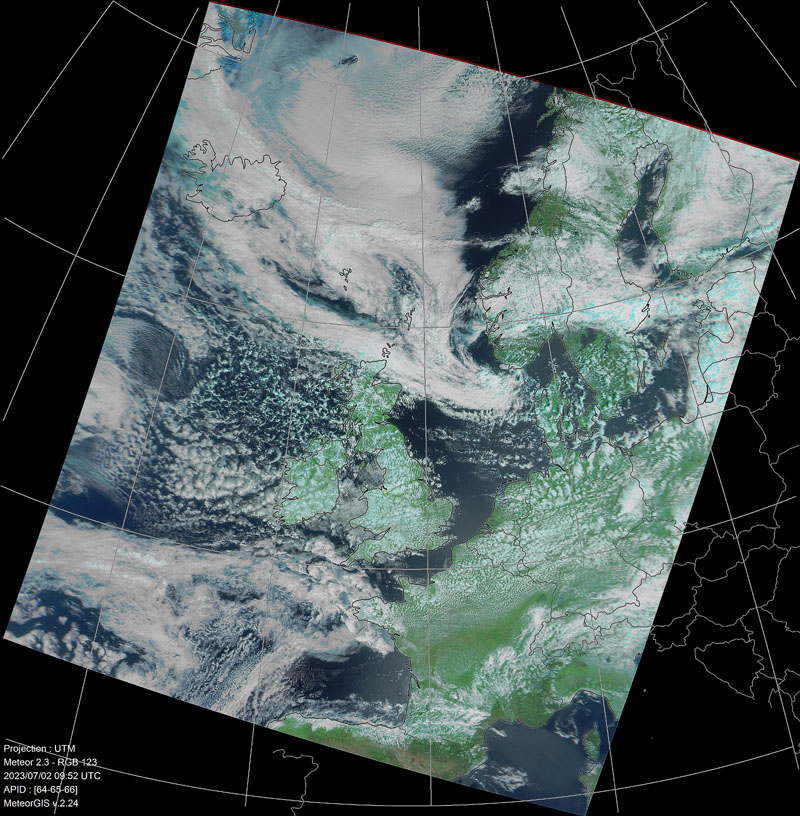
Meteor M 2-3 GIS image courtesy Rob Bale, acquired on July 2, 2023.
The MeteorGIS Suite Installer - updated for Meteor M 2-4
Thanks to the coding expertise of Christophe Marchand, author of the MeteorGIS software, it is now feasible to apply Geographic Information System (GIS) mapping to Meteor M 2-3/4 LRPT imagery.
I'm grateful to Rob Bale, who has adapted my Meteor LRPT Suite to interface with MeteorGIS, and thus automatically create a range of Meteor images with geospacial correction.
The Suite is provided as the zipped archive called MeteorGIS-installer.zip.
For those interested in the minutiae of setting up such a system from scratch, I recommend consulting the relevent section of Happysat's guide: "Setup Meteor M-N2-3 with LRPT-Decoder and MeteorGIS" on GITHUB.
To download the updated MeteorGIS Suite Installer
which uses Meteor plugin v 2.3 and LRPT Decoder v 59
This is the original version of the Suite using SDRSharp version 1555 (21 MB)
Updated Suite utilising SDRSharp version 1910

While the original version of this package including SDRSharp v 1555 works well for numerous receiving devices, including the popular R820T SDR & DVB-T units, I was contacted by an enthusiast who was trialling a more modern V4 USB dongle. He informed me that his new device would not operate with version 1555 of SDRSharp and hoped that a MeteorGIS Suite incorporating a more up-to-date version of SDRSharp might be forthcoming. This is now available.
To download the MeteorGIS Suite incorporating SDRSharp v 1910 (115 MB), click the button below.
WARNING: Use of this package on older, slower PCs with limited RAM (e.g. 4 GB) can cause the PC to completely 'freeze' part way through a pass. If you experience this, replace your MeteorGIS with the '1555' version.
NOTE
If you wish to install your MeteorGIS system from
scratch, check out Cees van der Laan's Guide from
the Guides Menu at the top of this page.
The archive MeteorGIS-installer.zip may be unpacked to, and run from, any root drive on your computer.
Note that you must install the package on to the root directory of your chosen drive, not in a subfolder; and whatever you do, definitely do not extract it into Window's Program Files folder: if you do it's absolutely guaranteed that it will not work!.
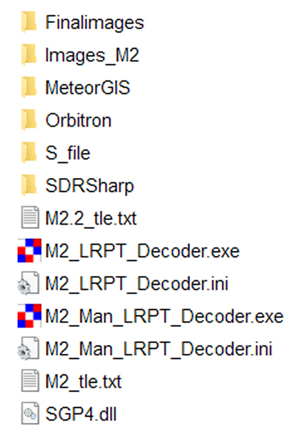
When you unpack the zipfile, everything that's needed is contained in a master folder called MeteorGIS: its component folders and files are illustrated in the diagram opposite.
The SDRSharp and Orbitron subfolders are the same as with the earlier suites. The image acquisition process is, as previously, initiated by running Orbitron.
It is no longer necessary to manually start SDRSharp. This is now done automatically from Orbitron.
But as soon as M2_LRPT_Decoder starts, its output is redirected to the software within the MeteorGIS folder.
Meteor s-files are then saved in the S_file folder.
Images from LRPTDecoder are saved in the images_M2 folder.
The GIS modified images are saved in the Finalimages folder.
Before you start ...
There are several things that you have to do to make the setup fully operational.
You will need a suitable dongle to receive the Meteor signals. A low-cost RTL-SDR Software Defined Radio dongle such as the one illustrated below is a good starting point. More sophisticated options are described in Happysat's Guide.

• Your computer must be on-line to run MeteorGIS. This is because the first thing MeteorGIS does when it runs is to
'phone home' to check for a new version and to download current keplerian elements for the Meteor satellites. If it cannot
accomplish these tasks, MeteorGIS simply aborts!
• If you haven't used SDRsharp for Meteor reception before, run zadig to install the RTL drivers for your dongle. You can
find instructions for using zadig here (you will find a copy of zadig.exe inside the SDRSharp folder).
• You will have to set the Tuner Correction (ppm) to precisely centre the frequency in SDR# for you own specific RTL dongle.
• The Meteor frequencies are currently 137.9 MHz for both Meteor M2-3 and Meteor M2-4 in both Orbitron and SDRSharp.
In Orbitron's 'Rotor/Radio' tab, insert the appropriate frequency for each Meteor satellite in the 'Dnlink/MHz' field.
A frequency of 137.1 MHz has been utilised in the past.
(You may have to alter these should either satellite switch frequency in the future.)
• You must enter your location coordinates in Orbitron's Location tab.
• You must enter your location coordinates in Meteor GIS using the provided MeteorGIS_Configurator.exe utility. This option
can be found near the foot of the Program tab.
• In Orbitron, click the ![]() symbol to enter your Time Zone. Note that the default package is set to UTC.
symbol to enter your Time Zone. Note that the default package is set to UTC.
Once this is done, everything is set to go. All you need to do is run the file orbitron.exe from the 'Orbitron' folder.
After a few seconds delay, SDRsharp activates, and Meteor data will be processed automatically by MeteorGIS on every pass, under control of SDRsharp.
And of course, you must connect a 137 MHz APT antenna (turnstile, QFH etc) to your dongle in order to receive the Meteor signals. Your APT antenna for the NOAA satellites is ideal.
What to expect ...
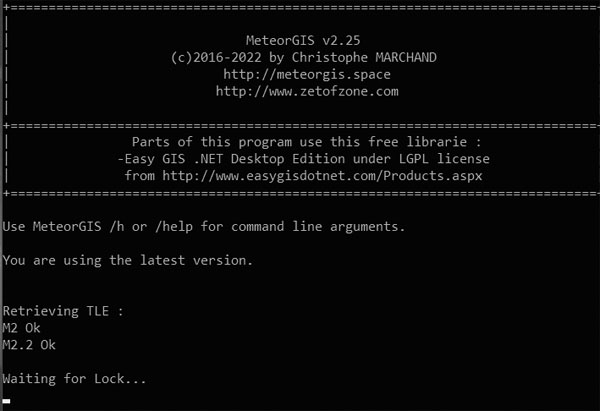
• As soon as the Meteor satellite has risen high enough above your horizon, SDRsharp will burst into life and the
Meteor demodulator plugin will activate, soon to be followed by the appearance of the MeteorGIS screen display
stating: "Waiting for lock" and "Connected to Meteor Demodulator Plugin".
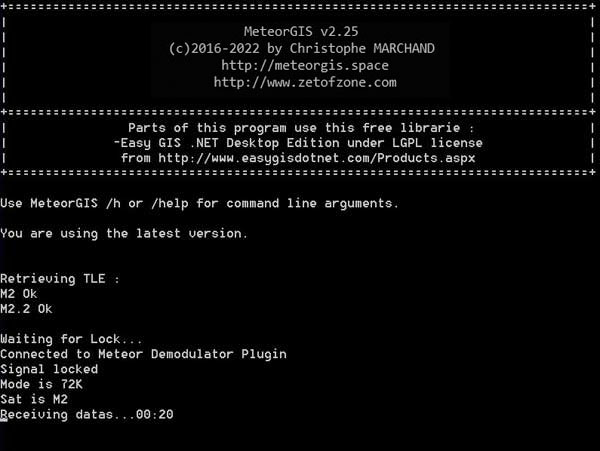
• Once the Meteor signal is strong enough, "locked" shows on SDRsharp's Meteor demodulator panel and
M2_LRPT_Decoder opens. Processing control now passes to the MeteorGIS software which now states:
"Signal locked", "Mode is 72k", "Sat is M2.2", "Receiving datas" (sic).
• Don't be put off by the reference to 'Sat is M2.2'. This is now just a label indicating that you are decoding in OQPSK.
• You should now be seeing the three Meteor channel images building up in M2_LRPT_Decoder.
The MeteorGIS panel doesn't show any more details while these images are building up.
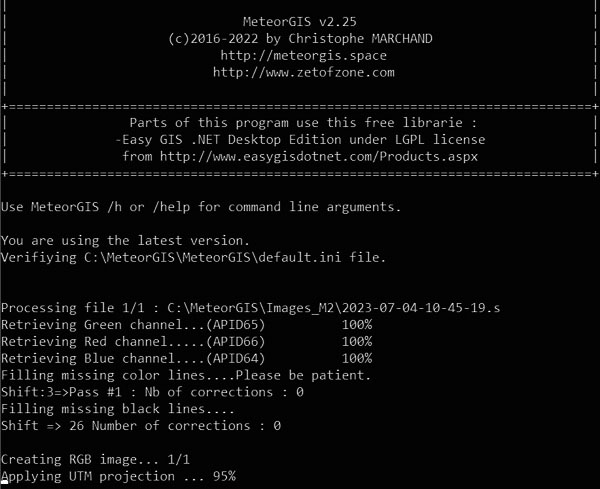
• When the Meteor pass ends, M2_LRPT_Decoder closes and disappears from the screen, and MeteorGIS starts
processing the data that's been collected, as in the screenshot below.
• Once MeteorGIS has completed its magic, it disappears from the screen, indicating that image processing is complete.
You can now view the geospacially corrected images in the Finalimages folder.
Note that there can be a pause—often lasting a minute or two until the satellite pass is complete—after SDRsharp loses lock on the Meteor signal, and before the processing details start to appear in the MeteorGIS window.
Do not try to expedite matters by closing SDRSharp - you will lose all the files currently stored in memory.
If you want to exit at this point, press the Stop button on LRPT Decoder, and a legend like this ...
![]()
... will appear at lower left of its window, indicating that all the files are being safely saved for MeteorGIS to process.
Adding Enhancements
The basic MeteorGIS software suite provided is a good starter option, but MeteorGIS is capable of much more. Extra and enhanced features can be brought into play by editing the default.ini and thermal.ini files within the application folder. This is achieved by use of a file named MeteorGIS_Configurator.exe, which sits inside the MeteorGIS application folder.
When you first run Configurator (by double-clicking it), it displays a file-list box with two entries for you to select: the two '.ini' files mentioned above. Once you select an ini-file, you will be presented with options which include:
|
• Change the projection (UTM or Mercator) • Process additional image types by application of colour palettes (thermal, ir_rain and rgb_rain) • Save the current kepler element files • Add a so-called watermark [information overlay including Satellite, date, time etc] • Add a marker to your geographic location and size it • Input the precise latitude and longitude of your location • Add a temperature scale to thermal images • Save images to a date-indexed folder • Determine the detail in the overlays (coastlines, boundaries, lat/long grid, labels) • And if you feel the need, you can edit the names and locations where images are saved. |
There are lots of modifications you can make, but be wary of changing too much at one go. I—and clearly many others before me—have made numerous alterations to MeteorGIS, only to discover that I ended up with a non-functioning system. So the advice is to make one change at a time and check it out by running MeteorGIS in manual mode (see next section).
After you have made changes to the .ini files using MeteorGIS_Configurator, you might have anticipated finding a Save button at the foot of the screen: I certainly did! But no such luck! You have to return to the top of the screen and confirm your edits using File/save on the top menu bar.
Composite Meteor Images
One of the most popular enhancements that MeteorGIS offers is the ability to combine successive Meteor images into a composite. If your location allows good all-round reception, it is possible to combine as many as four Meteor passes as in the illustration below.
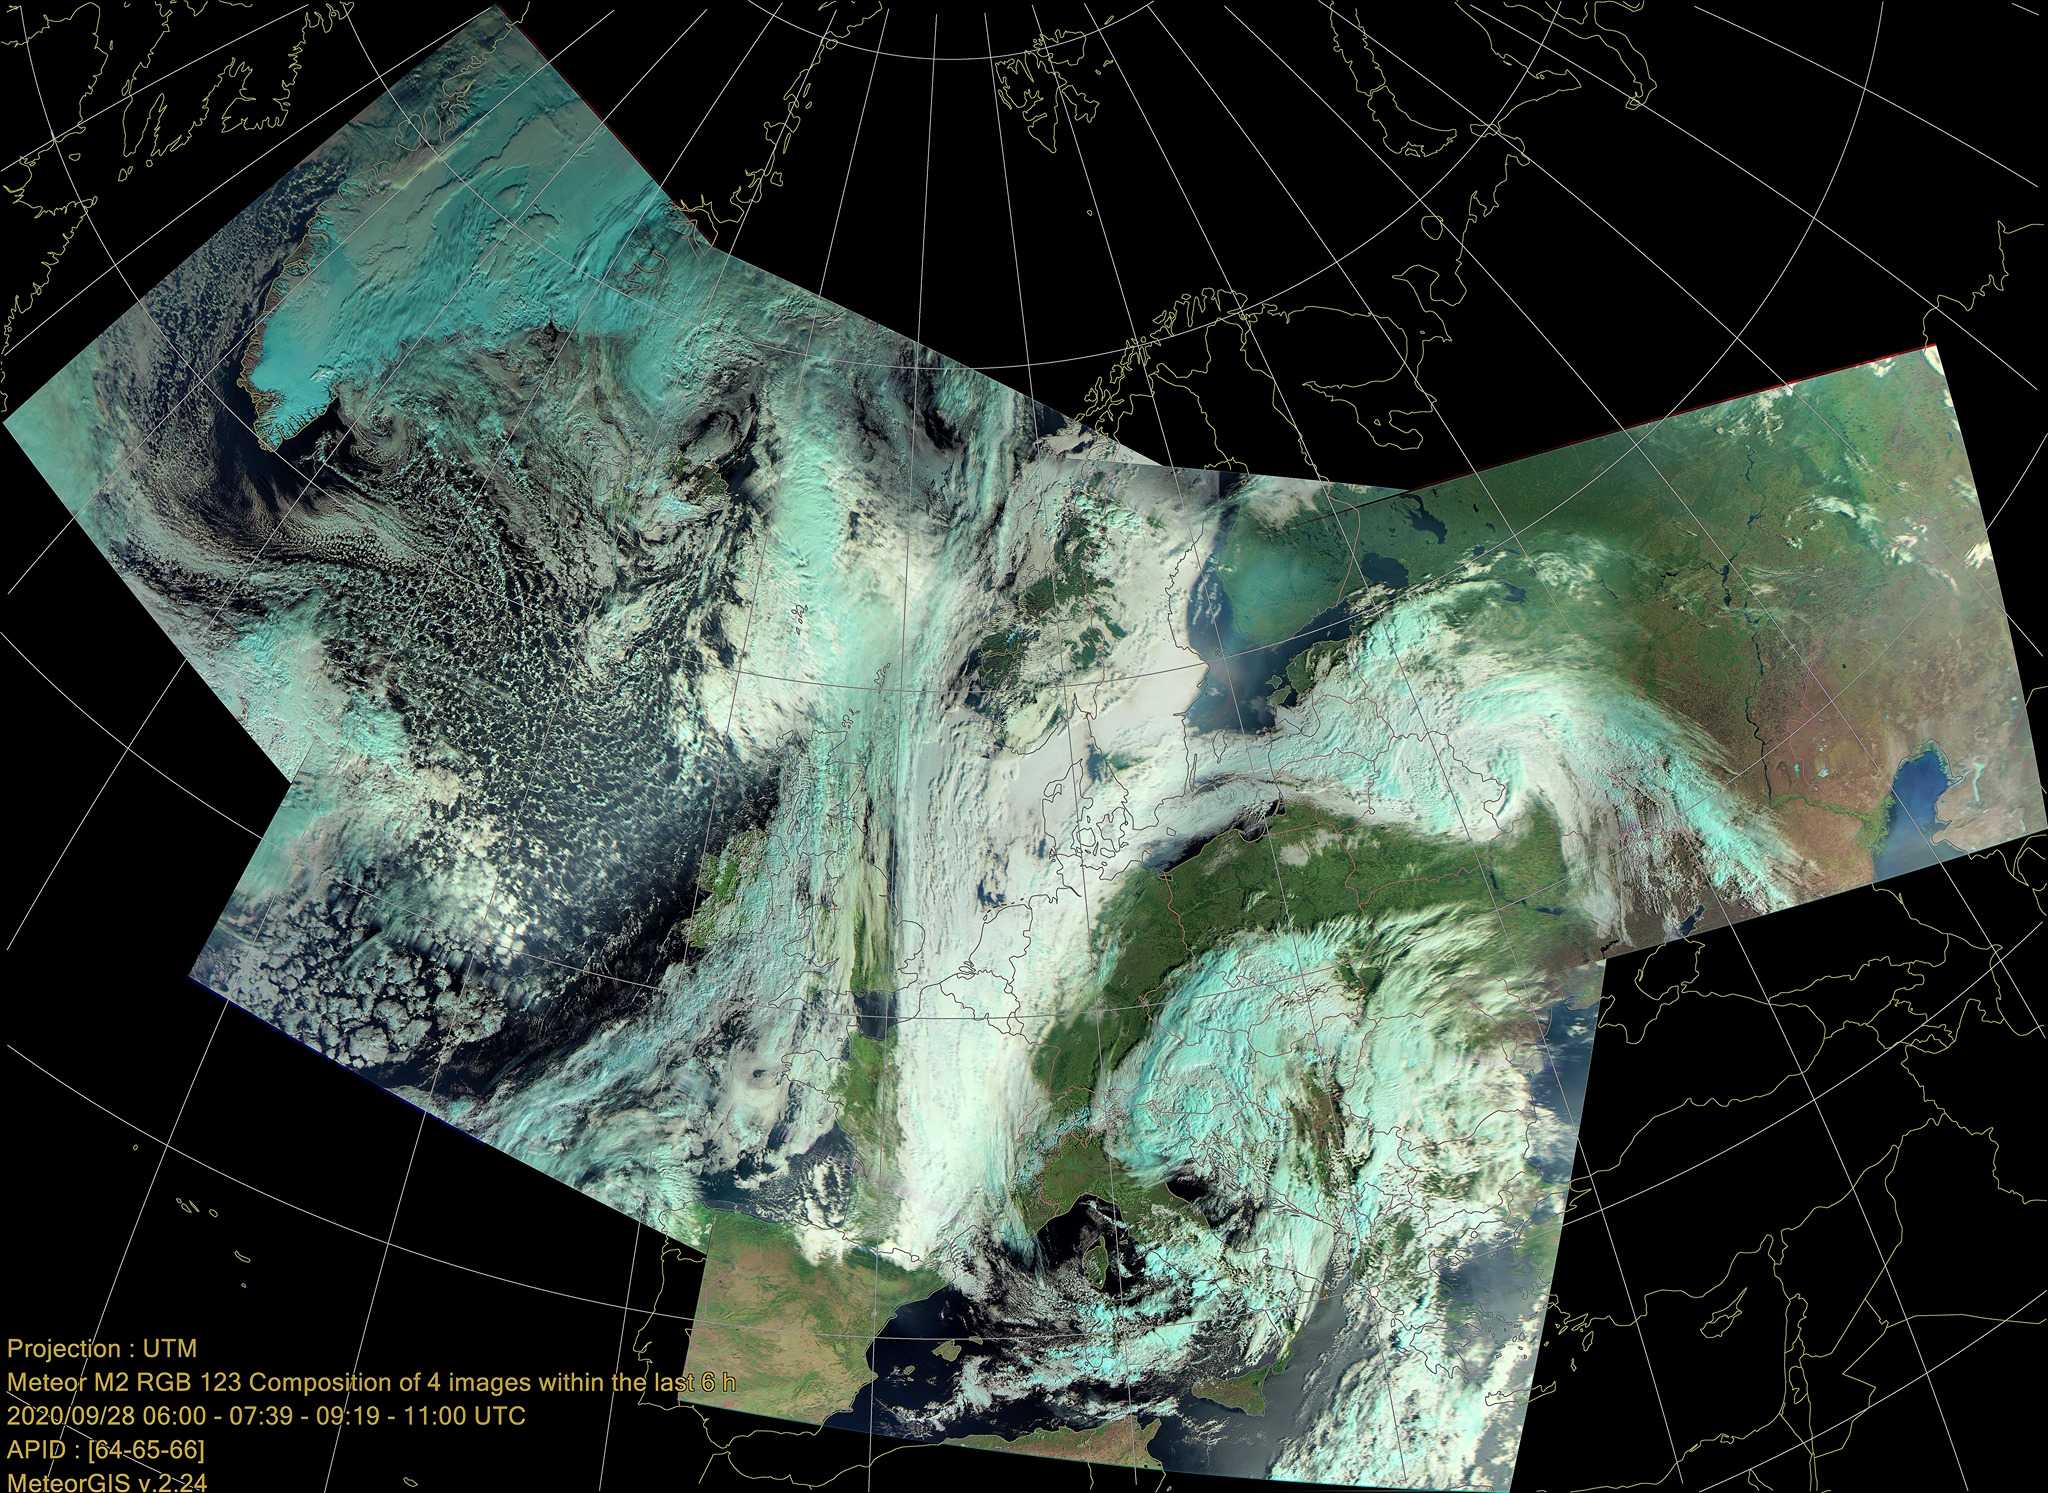
Meteor M2 GIS composite image courtesy Rob Bale. Click image for larger version.
To set this up, run the MeteorGIS_Configurator.exe program which you'll find inside the MeteorGIS sub-folder and load default.ini. The fifth option down on the Program tab is labelled Timespan composition, which consists solely of a slider bar. When you pull out this slider, it counts off a time period in hours within which Meteor images will be joined together.
The Meteor M satellites orbit Earth in approximaterly 102 minutes, so 2 hours will encompass two successuve images, 4 hours two successive images and 6 hours for three successive images, and so on. Just set the slider as appropriate, and don't forget to save the edited default.ini file. During processing, an additional composite image will now be formed with the prefix "comp-UTM-".
Running MeteorGIS in Manual Mode
There is a batch file in the MeteorGIS folder named Manual_M2_GIS.bat which allows you to manually reprocess the most recent Meteor pass. To do so, you must first of all delete all the existing images in the Finalimages folder. Running Manual_M2_GIS.bat (by double-clicking it) will reprocess the Meteor data and generate an updated set of geospatially processed images. Note that, if you don't first clear files from the Finalimages folder, no reprocessing will occur!
Image Overlays
There are two types of overlay that can be applied to Meteor GIS images: what the author terms Watermarks and Shapes.
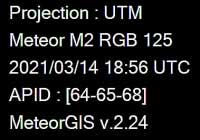
The Watermark is nothing of the sort: it is in fact an overlay showing information about the Meteor pass. A typical example appears opposite. There are options in the .ini files to change the colour, size and position of this overlay. This option is switched off in the MeteorGIS-basic suite.
The Shapes feature makes use of a set of 'shapefiles' present in the MeteorGIS folder to overlay 'shapes' over the modified Meteor images. The 'shapes' have the following effects:
| 0 | no overlays are added thus leaving pristine Meteor images |
| 1 | Coastlines are added to the images |
| 2 | Country boundaries are added to the coastline overlay |
| 3 | An additional latitude/longitude grid is superimpoosed on the images |
| 4 | Placenames (mainly capital cities) are added as labels |
| 5 | You barely notice this effect, which merely adds small triangular markers to indicate major mountains and high elevations |
The Shapes feature has a tab all to itself in MeteorGIS_Configurator.exe and takes the form of a slider-bar which you drag to set a number between 0 and 5 as appropriate for your needs.
Note that these operations are cumulative: you cannot, for example add a grid or placename markers without country boundaries and coastlines!
You can learn more about these overlays on the Mastering the MeteorGIS Shapes Options page.
Filling in the blanks
Due to a malfunction aboard the Meteor M2 satellite—apparently caused by buffer overflow—the LRPT images almost always exhibit intrusive, broad dark bands every six minutes or so.
MeteorGIS does its best to 'cover up' these areas by intelligent processing. Although the repairs are obvious if you zoom in closely, generally, when viewing the satellite images as a whole, the process does a remarkably good job.
MeteorGIS first makes repairs to each of the three greyscale images derived from LRPT Decoder, then creates an RGB composite image (RGB125 or RGB123) from these. The appropriate geospacially modified images are subsequently created from these (you can see references to 'corrections' in the MeteorGIS panel displayed above).
If you prefer your Meteor images simply to be rectified in their original form (without the GIS effect), you can process this composite RGB125/RGB123 image (also to be found in the FinalImages folder, with the prefix 'Treated') in SmoothMeteor, giving the bonus of removing any intrusive black bands.
More Images
To see a selection of MeteorGIS images illustrating the variety of formats
that are available by combining channels and adding colour palettes,
Decoding Historic Meteor M s-files
Meteor M2 arrived on the scene in 2014, five years before the MeteorGIS software added a new dimension to satellite imaging.
If you possess old Meteor S-files from this era, and would like to reprocess them with MeteorGIS, look up my page describing how to Reprocess Historic Meteor Data
This page has been accessed times.
Counter supplied by 

Please e-mail any queries to
This is NOT a link - you must type this address into your email application